Selfie thumbnails: put your own photo into a scene you never shot.
By the Vwrap team · Updated September 8, 2026
Vwrap builds a thumbnail around a photo you upload. Drop it into the Selfie slot on the create page, describe the scene, and the image model renders that person into it. The face carries, and the setting does not have to exist. A run returns 1 to 4 variants and bills the model's price per output, from 15 to 65 credits. The upload itself is deleted once the job finishes, unless you tick save.
How to generate a thumbnail from your own photo
Crop the photo and set what you want changed
Add selfie opens a square crop, then two rows of presets: expression (surprised, happy, serious, confident, angry) and clothing (t-shirt, hoodie, blazer, suit) in eight colours. Background removal always runs, whatever else you choose. The cutout is what reaches the image model, not the room behind you. A name field sits beside the slot; it is how your prompt tells two people apart once a second slot is filled.
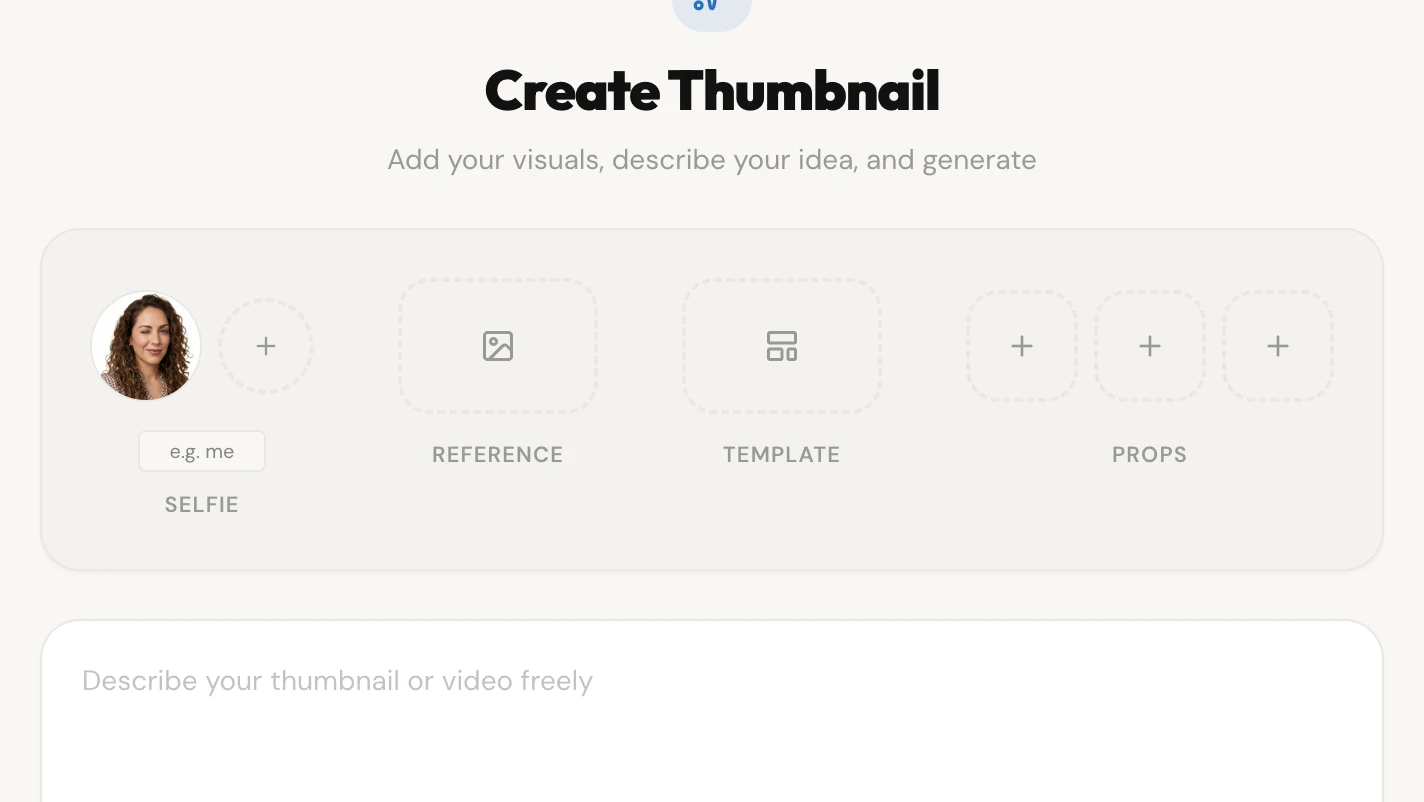
A photo in the Selfie slot, background already removed. Reference, Template and Props sit beside it unfilled. None of the four slots is required. Describe the scene, not the person
The prompt box takes the setting, the action and the mood. Leave appearance out of it: the scene description never names the face, the hair, the body or the skin, because a written description of a face competes with your photo and the two blend together. The run photographed below used one sentence: the selfie person alone on a mountain summit at sunrise, wide valley far below.
Pick a model and how many variants you want
The toolbar under the prompt prints each model's price beside its name: Qwen Edit 15 credits per output, Seedream 4.5 20, GPT Image 2.0 30, Gemini 3.1 Flash 50, Gemini 3 Pro Image 65. A layers button sets the output count from 1 to 4, and the run bills at that multiple. The result set below is four outputs on Gemini 3.1 Flash, so 200 credits.
Read the variants
Results open with the selected variant large, the rest as a filmstrip beneath it, and a list of suggested titles for the video. Any variant goes through to the layer editor, where the headline is still a text object you can retype rather than pixels baked into the picture.
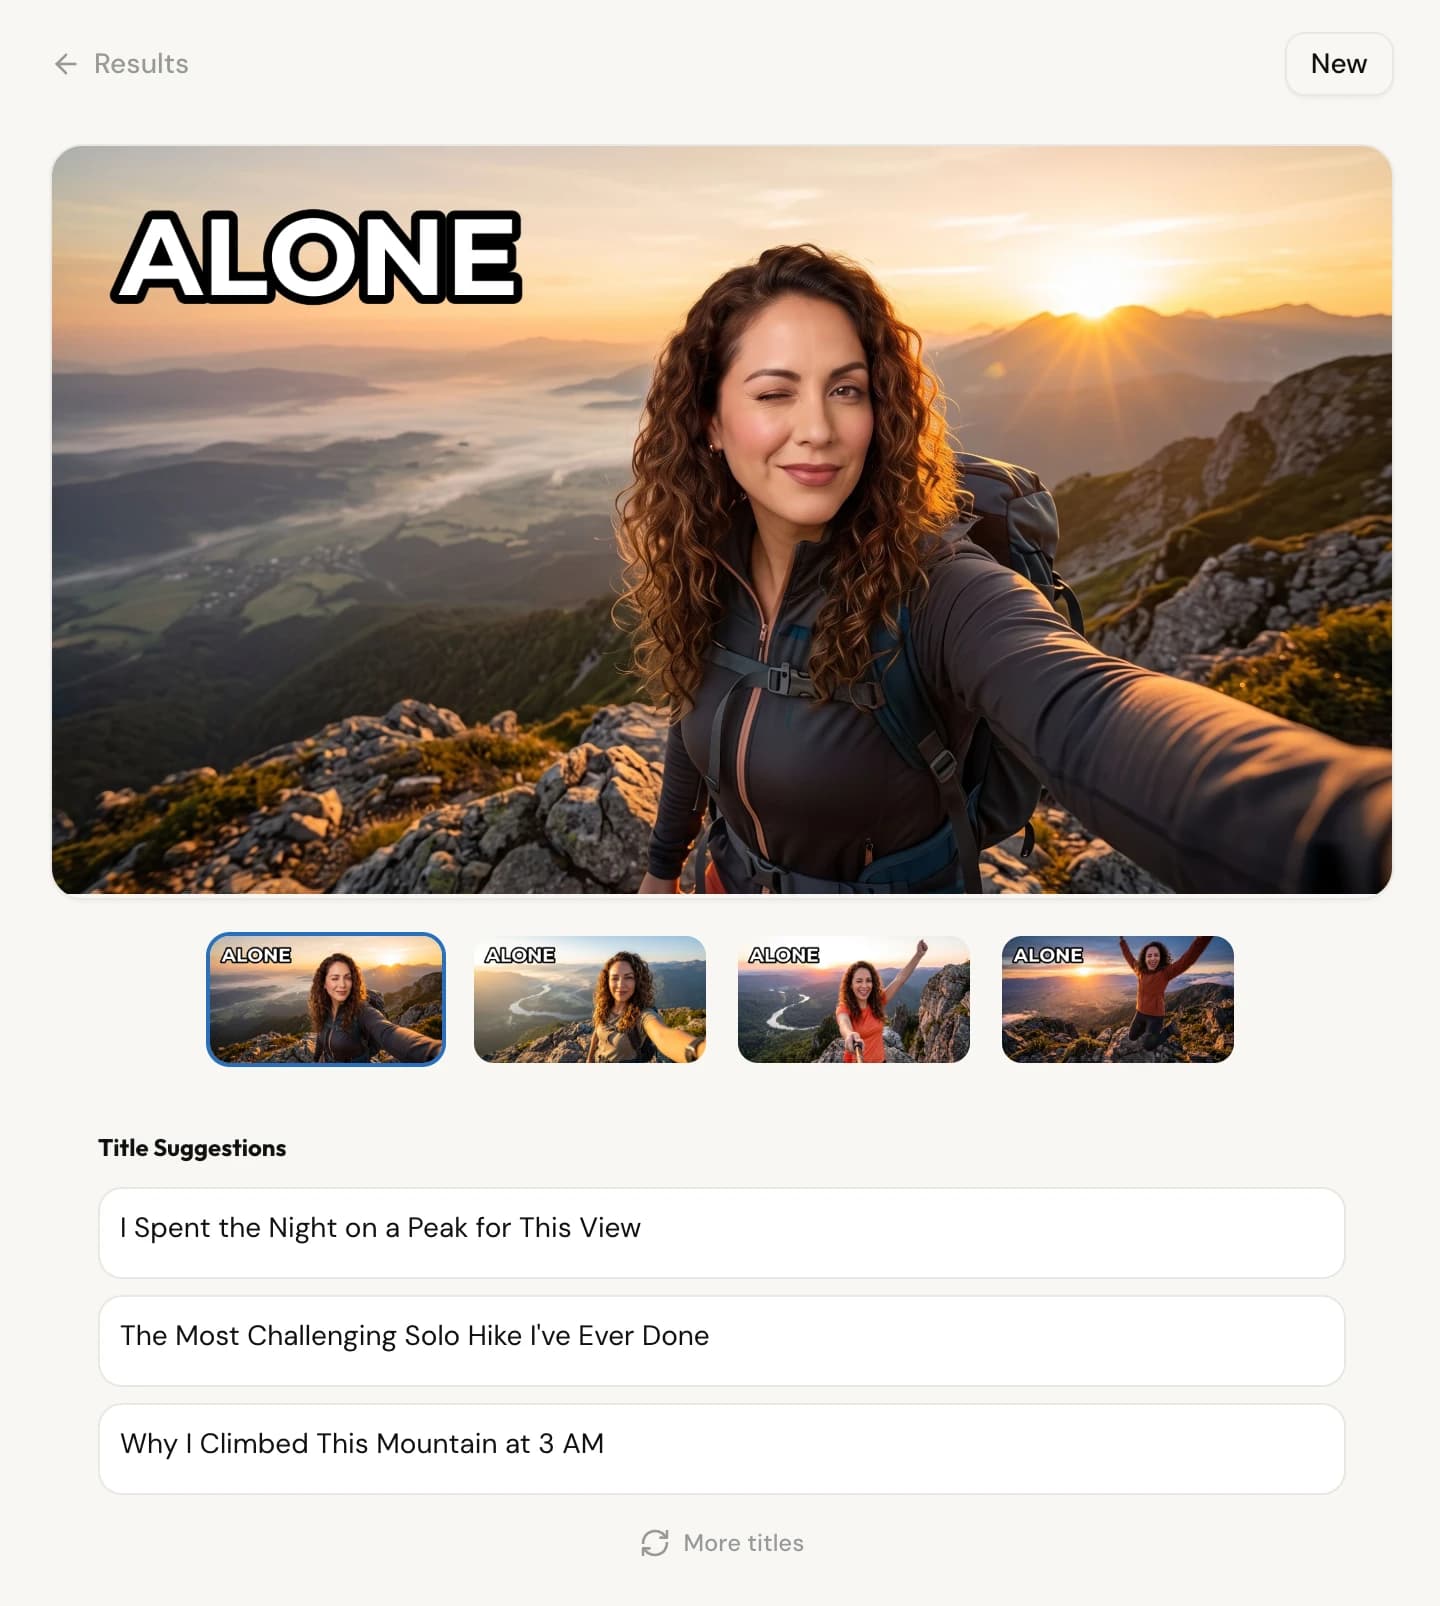
One run, four variants, one uploaded photo. The prompt asked for a summit at sunrise and the reference attached beside it was a skydiving thumbnail, so the setting is assembled rather than photographed. The wardrobe changes between variants; the face does not.
What the selfie slot controls
Identity, and nothing besides. The photo is cropped square, run through background removal, and handed to the image model as its own image, named as the only person in the output and protected from being averaged against any face in your reference or template. The written scene description works the other way round: it may place that person, pose them and set their expression, but never describes the face, the hair, the beard, the body or the skin.
Everything else in the frame is assembled. Wardrobe, light, setting and pose come from the scene, which is why the four variants above put the same person in different outfits. Expression is derived from the topic rather than defaulting to neutral, so a prompt carrying tension or shock renders that on the face. The practical consequence is that your photo does not need to match the thumbnail you want. A plain indoor shot in a t-shirt is enough, because only the face is being carried across.
How an edit reaches one person and not the others
By naming them, not by masking them. Select a person in the layer editor and add your own photo, and the detected box is turned into a phrase, such as the person on the left side or the person in the centre, which goes to the model together with the whole frame and your photo. There is no crop, no mask, no paste-back. The model returns a complete image, and that image is what gets stored.
Measured on production in September 2026, on a thumbnail holding two distinct, well-separated people: an edit scoped to one of them left the other's pose, gaze and clothing alone. The cost shows up elsewhere in the frame. Fine detail softens a little and the framing can shift slightly, because every pixel is re-rendered. What you will not find is a seam, since nothing is being seamed.
Why there is no mask
Masking was built, shipped and taken back out. The earlier path cut a tight silhouette around the selected person, erased the hole, generated a replacement and pasted it back at the same coordinates. It failed in one repeatable way: an automatic cutout has no idea which person you meant, so whenever two detected people overlapped it took the neighbour along, and the output showed a new person standing beside the original instead of in place of them.
The prompt-only path does not have that failure mode. It gives up byte-exactness in exchange. The finished image is re-encoded to WebP on its way to storage, so nothing survives an edit unchanged at the pixel level even in principle. We took the trade knowingly. Naming the target and re-rendering the frame produces better thumbnails than cutting the target out and gluing a new one into the hole.
What happens to the photo you upload
It is deleted when the job ends, unless you ask us to keep it. Save to my selfies is off by default; leave it off and the upload is marked ephemeral, and both the database row and the stored image files go as soon as the generation reaches a terminal state, success or failure alike. Tick it and the photo stays in your private library until you delete it, which removes the row and both stored copies.
Vwrap will not accept a first upload until you acknowledge a short notice, and that acknowledgment is timestamped on your account. The photo is a visual input rather than an identifier: no faceprint is derived, no recognition matching runs, and nothing is matched across sessions. Before anything else runs, the image goes through an automated content check at OpenAI, and a photo it blocks is refused rather than processed. After that it reaches Google, Replicate and fal.ai, the providers that draw the picture, and Supabase, where it is stored.
Costs, caps and plan credits
| Replace a person in the editor with your own photo, same price for the whole-person mode and the face-and-head mode | 15 credits |
| Upscale a finished thumbnail | 10 credits |
| Qwen Edit, credits per generated output | 15 credits |
| Seedream 4.5, credits per generated output | 20 credits |
| GPT Image 2.0, credits per generated output | 30 credits |
| Gemini 3.1 Flash credits per generated output, the model behind the result set on this page | 50 credits |
| Gemini 3 Pro Image credits per generated output, selectable on Pro and Studio only | 65 credits |
| Maximum variants per run on a paid plan or an active trial; the run bills per variant | 4 outputs |
| Maximum variants per run on the free plan once the trial has ended | 2 outputs |
| Generations running at the same time, free plan | 1 job |
| Pro trial on signup: full Pro access, no card required | 7 days |
| Trial credits granted at signup; unused ones expire when the trial ends | 500 credits |
| Free plan monthly grant, first issued when the trial ends | 125 credits |
| Starter, monthly credits | 2,500 credits |
| Pro monthly credits, which also unlock the premium image models | 5,500 credits |
| Studio, monthly credits | 15,000 credits |
What this does not do
- Nothing holds the untouched part of the frame in place. Every edit is a whole-image re-render from a prompt, so the model is asked to leave the rest alone but nothing enforces it. Expect mild softening of fine detail and a slight shift in framing across the picture. If you need a specific background pixel-for-pixel, this is the wrong tool for that job.
- Naming the target by its position breaks down when two subjects look alike. A frame that duplicates the same person on both halves gives the position phrase nothing to separate, and the edit can land on both. Two distinct, well-separated people resolve correctly.
- The photo settles who is in the shot, not what they are wearing. Clothing, lighting and pose are generated from the scene, and they differ from variant to variant in the same run. Set clothing on the selfie itself if it matters, and even then it is a preset list, not your own wardrobe.
- The layer editor works on thumbnails generated in Vwrap. There is no way to import a finished thumbnail from somewhere else and edit the person in it. Bring it in through the Reference slot on the create page and generate instead.
- One layer at a time. Writing prompt edits against two layers in a single batch is rejected outright; the approaches that would allow it all degraded quality badly enough in testing that the path was closed rather than shipped.
- The edit canvas is fixed at 1280 by 720. An image that is not 16:9 is stretched to fill it, so a 1.85:1 source sees roughly 4% of horizontal compression while you work on it.
- Layer detection is best-effort. It runs a type pass over the image and then an object detector, and a busy frame can leave something unfound. You can re-run detection after an edit.
- After the 7-day trial, a free account can ask for up to 2 variants per run, runs one generation at a time, and has no premium models. Any top-up pack lifts a free account to Starter-equivalent access until those credits are gone; the premium models stay on Pro and Studio.
- Your own likeness, or a person who has given you permission, and nothing else. Naming a real person in a prompt will not produce that person.